Thursday, January 30, 2014

Chewy Oatmeal Chocolate Chip Cookies

An evening alone calls for something yummy and trying a new recipe! I evaluated what ingredients I had on hand in my kitchen and came up with something perfect for the evening: Chewy Chocolate Chip Oatmeal Cookies!


Chewy Chocolate Chip Oatmeal Cookies

Ingredients
1/2 cup butter, softened
1/2 cup sugar
1/2 cup brown sugar
1 large egg, room temperature
1/2 teaspoon vanilla extract (I used vanilla bean paste.*)
1/4 teaspoon cinnamon
1/8 teaspoon nutmeg
1/4 teaspoon salt
1/4 teaspoon baking powder
1/4 teaspoon baking soda
3/4 cups flour
1 & 1/2 cups old fashioned oats
1 & 1/2 cups mini chocolate chips

Directions

1. Combine the following ingredients in a large bowl (I used my KitchenAid mixer): butter, sugar, brown sugar.


2. Add egg and vanilla. Mix well. 
[I use vanilla bean paste. I first discovered this amazing product at William Sonoma,
but also found a cheaper version of it at HEB/Kroger in the baking aisle.
The vanilla flavor is so much better than the liquid vanilla with alcohol in it.
Paste also ensures that the vanilla doesn't change the consistency of your dough. ]


When it is all mixed up, it will look like this:


3. Add cinnamon, nutmeg, salt, baking soda, and baking powder. Mix well.
[The dough will start to smell really good about this point with all those spices!]


4. Add flour and begin mixing. Then slowly add the oats until thoroughly mixed.

5. Add in mini chocolate chips and mix until just combined.


Ta-da! Now you have your delicious cookie dough!

Chill the dough in the freezer until the oven is preheated to 325 degrees. Chilling the dough will bind it together better so it doesn't spread out as much when baking.

Once the oven is preheated and the dough is slightly chilled, take the dough out of the freezer. Line a large cookie sheet with parchment paper. Create 1& 1/2 inch balls of cookie dough and place them 3 inches apart on the cookie sheet.

Before putting the cookie sheet in the oven, flatten the dough with the palm of your hand until it is about 3/4 an inch thick.

Bake for 18-22 minutes (depending on how chewy or crispy you want them).


While I was baking, Tucker was quietly plotting as to how to steal all of the cookies...

I used the recipe from this blogger's page and made a few changes. 

Throwback Thursday: Tucker


Throwback Thursday... to the day I adopted Tucker. 

While I was growing up, I had a dog named Cocoa. She was a cocker spaniel and I loved her to death. When I left for college I missed having a dog around the house, but knew that I did not have the time, as a college student, to take care of a puppy. 

I started browsing dog adoption websites while I was abroad in Italy. I had just found out that I was going to be staying in College Station and attending grad school and I thought that I'd have more time as a graduate student to raise a puppy. 

After returning to College Station and graduating the next day, Megan and I only waited about a week before we took a trip to the Montgomery County Animal Shelter. She was going to be my partner in crime, as usual. 

The shelter was overcrowded with animals at the time and were doing adoptions for half off. Megan and I spent about 30 minutes playing with different puppies and enjoying all the puppy kisses before we spotted a little, brown fur ball. He was 3 pounds and 4 ounces and a shelter staff member told me the person who dropped him and his litter-mates off said they were a boarder collie mix. 


He went through a 6-8 month period when I had no idea what he was going to end up looking like full-grown. He went from tiny fur ball to pomeranian lookalike to an adorable, hairy dog.


Tuesday, January 28, 2014

Ham and Cheese Quiche


Ingredients
1 deep-dish frozen, uncooked pie dish (I used two normal depth pie crusts)
6 oz. sharp cheddar cheese, shredded
1 tablespoon flour
1/2 cup onion, chopped
1/3 cup bell pepper. chopped
1 tablespoon butter
1 & 1/2 cups ham, cubed
2 eggs, beaten
1 cup milk
1 teaspoon dried parsley
3/4 tablespoon seasoned salt
salt and pepper to taste


Easy Instructions
Preheat oven to 375 degrees before you begin.

1. Place cheddar into a medium bowl.
2. Mix flour into the cheddar and toss until cheese is coated in flour.
3. Throw chopped ham into bowl with cheese.
4. Saute onions and bell peppers in nonstick pan with butter.
(I didn't have any onions, that's why they're not pictured here!)


Mix all ingredients in bowl.
Place into the bottom of the pie crust.
Mix eggs, milk, salt, pepper and parsley.
Pour wet mixture evenly over the quiche filling.


Bake for 35-45 minutes or until the middle of the quiche is firm.


Got the recipe for this quiche here

Delicious Chocolate "Bits" Cookies

I've never made a particularly good chocolate chip cookie and honestly, most of the time I just do break-and-bake.

But, while we were watching the Grammy's, Jacob said he was craving something sweet...  and I jumped at the opportunity to try another recipe.

I knew that I had the ingredients for chocolate chips, but that I would have to be creative on what to use as the chocolate. I decided on the Valentines Day M&Ms and semi-sweet chocolate cubes.

I made slight alterations to the recipe found here. The cookies turned out great! I even got a raving review from one of my coworkers.


Chocolate "Bits" Cookies


Ingredients
1 & 1/2 sticks unsalted butter, softened
3/4 cups brown sugar
1/2 cup granulated sugar
1 large egg
2 teaspoons vanilla extract
2 cups all purpose flour
2 teaspoons cornstarch
1 teaspoon baking soda
1/2 teaspoon salt
1 and 1/2 cups mini chocolate chips/mini m&ms/ semi-sweet chocolate

Steps

1. In a large bowl (I used my KitchenAid Mixer), beat the room temperature butter on medium speed until smooth.
2. Add both sugars and mix together until fluffy.
3. Mix in egg and vanilla thoroughly. Scrape everything to the bottom of the bowl and mix well.
4. Slowly mix in the dry ingredients. The dough will get very thick, so if you're using a KitchenAid, make sure the top of the mixer is locked down.
5. Add your chocolate. I used a chopped up semi-sweet chocolate bits and chopped up M&Ms. Mix until chocolate is just mixed in.
Put plastic wrap on bowl or put dough in airtight plastic container. Put in the refrigerator for at least one hour. This helps everything bind together and be thick cookies when they are cooked. (If you don't want to wait for an hour, I placed mine in the freezer for about 20 minutes and it worked great.)
Take dough out of the refrigerator and let come to room temperature while the over preheats to 350 degrees. Line a baking sheet with parchment paper. Roll dough into one-inch balls and place them on the baking sheet two inches apart. Bake for 9 to 11 minutes or until edges are just golden brown.
I took a batch of these to work and put them in the break room for staff to enjoy. Later that day, I got an all-staff email from someone saying they were the "BEST COOKIES EVER!" and that they must have the recipe. I'll repeating this one! Simple and delicious! The cornstarch really makes the cookies moist and thick- good touch!


Friday, January 24, 2014

Great Texas Snowpocalypse of 2014

You know you live in Texas when schools and businesses close down or open late when there are cold weather events. Last night, College Station had a little snow, ice and the always fun "wintry mix."
It all started around 10pm, you could hear the frozen rain plinking off the windows and doors.
When I woke up this morning to head to work there was a little frost/snow/ice on the roof of the house
 and a thick layer of ice on my windshield, which this native Texan was not nearly prepared enough to scrape off.
It was nice to see a little bit of winter in College Station, but I'm ready for that 70 degree weather that we typically have around this time of year. 

 Tucker didn't quite know what to think of the snow or the frozen, crunchy grass.
He ran around the backyard like an excited little puppy though... so I think he liked it.
Maybe I have a cold-weather dog on my hands.


Tuesday, January 21, 2014

Valentine's Day Wreath

It's that time of year again when red and pink decorations begin appearing in stores and boxes of chocolate seem to be absolutely everywhere!

I ran across this project around this time last year and even though I'd never made a wreath before, the instructions seemed easy enough. I made one and it turned out so cute! I had leftover supplies (I bought 3 styrofoam wreaths in the hopes to share my creations) and knew it'd be the perfect time to start creating since Valentine's Day is nearing.  Luckily, I have the two perfect people to give these wreaths to! My sister is decorating her new apartment and my mom is always kind enough to find room for my crafting projects. :)

Supplies

Heart-shaped styrofoam wreath ring
[I brought mine from Hobby Lobby for about $2]

1 yard pink or red felt- I had enough to make 3 wreaths
[I bought mine from Hobby Lobby for $5.99/yard]

Scissors

Straight pins


Instructions

Choose a circular shape to trace onto your felt.
I think I used a soup can or something, it was about 3 inches in diameter.

(Sorry- the circles I traced don't really show up in the photo. They are there, though! I promise!)


Cut the felt into strips of circles. This makes it easier to cut the circles out.

I cut out about 100 circles. How many you will use depends on how tightly or loosely you space them.


Fold each circle in half and place a pin close to the edge of the flat side, through both pieces of felt.


Fold that in half and pin the circle to the styrofoam wreath form.

Pin them all on, close together so you cannot see any white between them.
I arranged mine kind of in an inner-circle and outer-circle on the wreath form.
You can kind of see the two rows on the finished product.

When you've put them all the way around, the wreath will look like this!


Flip the wreath over and pin a small loop on the back. I created the loop out of the extra felt. I cut a little strip, doubled it over, and pinned it to the back (pointy side facing upwards so it won't fall out). 


These are my two finished wreaths!

I'm pretty proud and my mother and sister love them!


Saturday, January 18, 2014

Simple Pancakes from Scratch


Makes 10 5-inch pancakes.

Ingredients
1 and 1/2 cups all purpose flour
3 and 1/2 teaspoons baking powder
1 teaspoon salt
2 tablespoons sugar
1 and 1/2 cups milk
1 egg
3 tablespoons butter, melted

4 Simple Steps:

1. In a large bowl, combine flour, baking powder, salt, and sugar.
2. Create a crater in the middle of the flour and crack the egg into it.
3. Pour in milk.
4. Pour in melted butter.

Stir thoroughly, until smooth while your non-stick skillet heats up on medium heat.


Use a measuring cup to help you keep the size of your pancakes consistent.
I used a 1/4 cup and made 10 pancakes with this recipe. 

You will know pan is hot enough when you sprinkle water on it
and the water begins to "dance" and evaporate.

Pour pancake batter into middle of non-stick pan. 


Cook pancake until bubbles begin to rise to the top and begin to pop (like in the picture above).
Flip pancake and cook for another minute or until second side is also golden brown.

Ta-da! Easy pancakes made from scratch!

Hash Brown Potato Cakes

Saturday morning calls for sleeping in and enjoying a late brunch. I saw this recipe on Pinterest and thought it would be great to make a batch on the weekend and freeze the rest for breakfast throughout the week. The Pin (blog) that I got the idea for these little breakfast nuggets is here

The little potato cakes were really simple to make and were delicious. I'd definitely make these again! 


Ingredients 
1/2 a bag of frozen shredded hash browns (~4 cups)
3 eggs, beaten
1/2 cup shredded cheddar cheese
1/2 cup chopped onion
1/4 teaspoon ground mustard
salt and pepper to taste


Recipe makes 12 potato cakes. 

Easy instructions...

Preheat oven to 350 degrees

Pre-grease your muffin pan 

Pour frozen shredded hash browns into large bowl, 
followed by the onion, salt, pepper, and ground mustard. 


Pour in egg and mix. Add shredded cheddar cheese and mix again. 


Spoon into greased muffin pan. 

Bake for 23-27 minutes (depending on how crispy you'd like your potato cakes to be).


These things are delicious and only 4 WW points each! 

Friday, January 17, 2014

Another Pin: Crock Pot Balsalmic Glazed Pork Loin

My sister has been talking about this recipe for weeks! She has started to cook at home more too so we have been able to exchange recipes that work out great. I used the recipe that this blogger shared, but halved the ingredients since we are only cooking for two. 

Ingredients
1 pound boneless pork tenderloin
1 teaspoon ground sage
1/2 teaspoon salt
1/4 teaspoon pepper
1 clove garlic, crushed
1/2 cup water

Glaze
1/2 cup brown sugar
1 tablespoon cornstarch (I substituted this for all purpose flour)
1/4 cup balsamic vinegar
1/2 cup water
2 tablespoons soy sauce

What I'd do differently...
I might marinade the pork tenderloin the night before to let the flavor sink in.

We served ours with white rice and some of the liquid from the bottom of the crockpot.

Tuesday, January 14, 2014

Cake Mix Cookie Bar Goodness

At work, we have a monthly birthday celebration when we're all encourage to bring treats and sweets if we'd like. We get to celebrate everyone who had a birthday that month and I get to try out new recipes!

This month I decided to try out a simple recipe that had been on my Pinterest 'to-make' board for a while: Cake Mix Cookie Bars! This recipe is so simple! I made mine with a Valentine's Day twist since there were Valentine's Day M&Ms at the grocery store... a few weeks early, but hey, they're cute!


Ingredients
1 box yellow cake mix
1 box instant vanilla pudding
2 eggs
3/4 cup butter, melted
1/4 cup water
1 cup chocolate chips or M&Ms


Preheat oven to 350 degrees. 

3 Simple Steps:

1. Beat 2 eggs and stir in melted butter until well-mixed.
2. Stir in cake mix, pudding mix, and water.
3. Mix thoroughly.

The pudding mix will make the batter really thick.
Make sure to stir it well and get rid of all of the powdery clumps.


Mix in your candy- either chocolate chips or M&Ms.
Spread into a greased pan.


Bake in a 350 degree oven for 25-30 minutes. 

When it's done, it will have a golden top and you can insert a toothpick and it will come out clean.

One thing I may change next time... put the M&Ms or chocolate chips on top of the batter when it's already in the pan since they will sink into the batter when cooking. 


They're yummy and really moist! 


Monday, January 13, 2014

Crock Pot Mac & Cheese

With a new year comes resolutions to eat healthier and cook more meals at home. Cooking more at home gives us the opportunity to use the crock pot more. I love being able to throw all the ingredients into the pot and walk away. 

Tonight we made Slow Cooker Mac & Cheese. Since we are also trying to eat healthier, I took a recipe that I found on Pinterest and made it lighter by using fat free dairy and whole grain pasta. I also added a little bit of ground mustard to give it more flavor. 

The recipe that I adapted was from the Food Network's Tricia Yearwood's Southern Kitchen


Ingredients

8 oz. elbow macaroni (i used whole grain), cooked al dente
12 oz. can fat free evaporated milk
1/2 stick of butter
1 teaspoon salt
1/4 teaspoon of black pepper
2 large eggs, beaten 
5 cups fat free cheddar cheese, shredded
1/2 tablespoon ground mustard
dash of paprika

Line your crock pot with disposable liner- these make clean-up a snap and saves so much time scrubbing the pot after cooking a meal all day. 


Combine in crock pot: cooked elbow macaroni, evaporated milk, milk, butter, salt, pepper, ground mustard, beaten eggs, and 4 1/2 cups cheddar cheese. Sprinkle the last 1/2 cup of cheddar cheese on the top of the mixture. To top it off, sprinkle paprika on top. 


Put lid on the crock pot and cook on low for 3 hours and 15 minutes. 

Ours turned out delicious! If we had not used fat free cheddar, it probably would have melted into a creamier consistency. Of course, fat free cheese allows you to feel less guilty about having a bowl of it! 

Sunday, January 12, 2014

Girl's Day Ice Cream

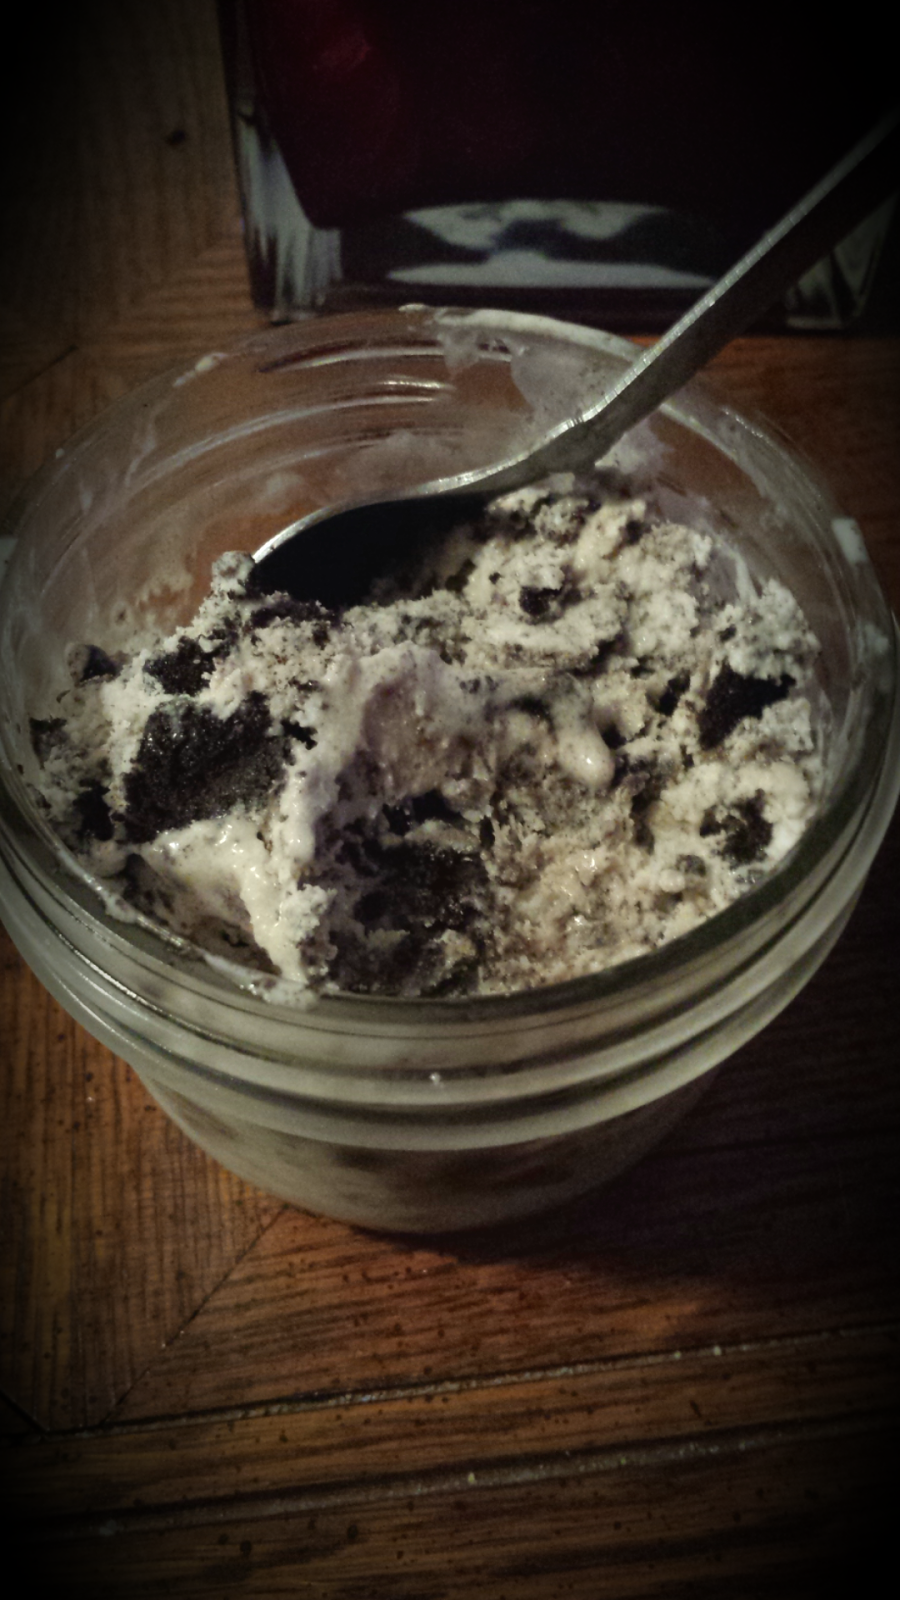
Megan came into town this weekend for a girls day and in addition to seeing Saving Mr. Banks, we also made cookies and cream ice cream with the refurbished Cuisanart ice cream maker that my sister bought for me last year.

I couldn't find the recipe that we used, but the ingredients were:

2 cups heavy cream
1 cup whole milk
1 tsp vanilla
1 cup sugar
15 oreos, chopped

Make sure the bowl from the ice cream maker is in the freezer overnight before you plan on cooking ice cream.

Cook the mixture on the stove until all of the sugar has dissolved. Once dissolved, place the mixture in the freezer until it is chilled. Place mixture in ice cream maker and let it churn for about 30-45 minutes. Right before you take the ice cream out, add the Oreo pieces into the mixture until just all mixed together. Put ice cream into plastic container and place into freezer to finish freezing.

The finished product:


It's pretty bad for you, but it's really good! 

Sunday, January 5, 2014

Peg Board Jewelry Rack

I have been envying some of the jewelry racks that I've been seeing on Pinterest these past few months. With the extra time over holiday break I set out to make one of my own. I got the general idea of what to do from The 36th Avenue. Her's is a part of a bigger accessory station and includes a small dresser for storing scarves and shoes. I created mine a bit different from her, but it still turned out looking great!

Supplies I used:
-1 20x16 black frame from Hobby Lobby
-1 piece of pegboard (just smaller than 20x16 so it will fit into frame)
- metal pegs
- spray paint
- Gorilla Glue or another strong glue
- frame hanging kit

I purchased a 20x16 frame (50%  off sale at Hobby Lobby) and peg board, pegs, and a frame hanging kit at Home Depot. Hobby Lobby will cut the peg board for you if you let them know what size you need- now I have the extra pieces of peg board to use for more projects!

I used some leftover gold spray paint to paint stripes on the board. I used 1" blue painters tape to tape off horizontal stripes and sprayed on two layers of paint before peeling the tape off. I removed the glass and backing from the frame and once the painted peg board was dry (1-2 hours) I used Gorilla Glue (left over from another project) to secure the peg board into the frame. It took about an hour or two for the glue to fully dry- it doesn't need to be Gorilla Glue, just something strong enough to keep the peg board in the frame once there is some jewelry on it. Note: There needs to be about half an inch to an inch of space between the back of the peg board and the wall so pegs can be placed in the board.

Once the glue was dry, I had my boyfriend screw in the frame hangers into the back of the frame, nailed two frame hanging nails into the wall and hung that sucker up. I bought a variety of different pegs to hold different jewelry.

Now all of my jewelry is in one place in my bathroom and I can quickly accessorize in the morning when I'm prepping for work! In the future, I may add a paper-covered can and frame earring holder like the ones from The 36th Avenue, but for now I am just really excited about my new decorative addition!